

kimbap shaped bibimbap
note | i submitted this recipe in the 'discover korea's delicious secret'. i am excited when i found a competition that combined both my loves together :: food and super junior :) i remember staying up for hours trying to come up with something interesting. this was chosen as one of the five winning recipes ^^ (uber excited about it!). congratulations to the other four winners! love you girlies!
i remember the first time i had korean food which was probably sophomore year in college. that was a long time ago and my love for korean food has grown quite considerably.
the first thing i ever tried that was korean was bibimbap. my first experience with bibimbap wasn't quite the right way of having it since i didn't mix vegetables + meat + rice + sauce together although a few of my friends insisted i should.. bibimbap {비빔밥} literally means "mixed rice" (hence the reason why i said it is the right way to eat it). it encompasses a lot of flavors korean cuisine represents - a healthy mix of meat (typically bulgogi) and various julienned vegetables which are brought together by the gochujang sauce.
kimbap {김밥}, on the other hand, is korean version of a sushi roll. gim or kim {김} is roasted seaweed while bap {밥} translates as rice. i've combined two of these iconic korean dishes to make my very own kimbap-shaped bibimbap so you can get the ingredients you would in a bibimbap in a roll that you can easily share with others or enjoy it as a snack/meal on the go.

there are two parts to this recipe :: bulgogi preparation and kimbap assembly. in a past entry, i have shared a bulgogi recipe which you could use for this recipe or you can skip forward by buying bulgogi from a korean restaurant or use a bottled marinade. this is also a perfect way to finish leftover bulgogi! :)
so the second part of the recipe which is the kimbap involves a bit of julienne-ing and a bit of stir frying but i promise you it's very simple.
instragram-ed :: ingredients preparation for kimbap

so the second part of the recipe which is the kimbap involves a bit of julienne-ing and a bit of stir frying but i promise you it's very simple.
instragram-ed :: ingredients preparation for kimbap


once you have all the ingredients ready, the next part is probably the most challenging step which got me a tad nervous at first :: the assembly of kimbap which involved rolling all the ingredients into a tight roll and making sure it doesn't fall apart.
instagram-ed :: kimbap ingredients done


instagram-ed :: assembly and rolling of kimbap


after getting a hang of it, it really wasn't that hard to roll the kimbap. although kimbap is typically not served with any dipping sauce, i made a gochujang sauce which is what you would get with bibimbap.

verdict | my co-worker, SL is my korean food tester since he's actually from korea. :) when i brought some to work to have a few friends try it, SL was quite impressed that i made kimbap lol. his exact words were, "whoah, this tastes legit!" and he added it was tasty! haha. that is quite the compliment. well that and this being the winning recipe :) christina pretty much concurred with SL's views and although she has not tasted kimbap before, she could still tell that this was a korean dish which makes me really happy.
my thoughts? the best description is probably this was "bibimbap in a bite" especially if you dip it in the gojuchang {고추장} sauce which is awesome because that was exactly what i was aiming for.. i love the flavors as much as i love how attractive this colorful kimbap is...plus it truly is yummy!
if you are feeling adventurous and would love to try this recipe ::
bibimbap kimbap {비빔밥 김밥}
my original recipe inspired by my first love with korean food. the bibimbap

ingredients |
- 1/2 medium zuchinni, julienned
- 1/2 medium carrot, julienned
- 2 eggs, beaten
- 1 packed cup of fresh spinach
- 1/2 cup of sliced kimchi, drained
- 1.5 cups of cooked rice
- Toasted sesame seeds
- 3 tbs sesame oil
- 1 tbs vegetable oil
- 1/4 tsp salt
- Bulgogi (leftovers or made fresh)
- Sheets of gim or roasted seaweed
- 3 tbs red pepper sauce
- 1/4 tsp soy sauce
- 1tsp brown rice vinegar / apple vinegar
- 1 tsp sugar
- 3/4 tsp sesame seeds
- 1 tsp sesame oil
- 1/2 tsp minced garlic
special equipment needed: bamboo mat for rolling the kimbap and plastic wrap
directions |
directions |
ingredients preparation for kimbap
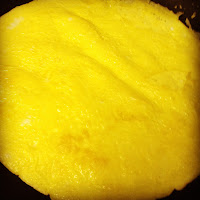
- firstly, beat 2 eggs in a bowl and add 1/4 teaspoon of salt. pour the egg mixture into a medium frying pan with 1 tablespoon of vegetable oil over medium low heat and swirl the mixture to make a thin layer of omelette
- when the bottom of the omelette is cooked (~5 minutes), flip over gently with a spatula and continue cooking for about 2 minutes. you do not want to burn the omelette so patience is needed here
- once cooked, remove from the pan and let cool for a few minutes. once it's completely cooled, slice the omelette into about 1 cm strips
- using the same frying pan, add a teaspoon of sesame oil to saute the julienned carrots with a pinch of salt. this is just to remove the rawness of the vegetables so it will only take about 3-5 minutes
- repeat this step for zucchini and spinach. remove from the pan and place all your ingredients on a plate to let cool before rolling the kimbap
- for the cooked rice, add about 1-1.5 tbs of sesame oil and a sprinkle of toasted sesame seeds (personal preference) while the rice is still warm. mix thoroughly and let it cool to room temperature
kimbap assembly

- prepare all the ingredients and equipment needed. first, start off with a bamboo sheet, then place a plastic wrap and finally a sheet of gim atop the plastic wrap (more for the purpose of easy clean up)
- spread a thin layer of rice over the gim, leaving about an inch from the bottom edge. (try to make sure it's not too much rice or not it will just taste mostly rice)
- arrange all the ingredients neatly (zucchini, carrots, spinach, bulgogi, egg and kimchi) on the top edge (the end where the gim is covered fully by rice). try not to put too much ingredients or not it will be difficult to roll the kimbap tightly
- take the same end and slowly and gently roll over with the bamboo mat around the filling (if it fails the first time, don't worry - it takes practice)
- after fully encircling the kimbap filling, give it an extra few squeezes with your hand to tighten and firm up the roll
- continue rolling till it reaches the end. (this is what i learned from the master himself) at the end where you left 1" of gim uncovered, brush a very tiny amount of water and then roll it until it sticks to give you a tight roll. face the sealed end on a surface for a few minutes before cutting to let the make sure the roll stays intact.
- now, you can use a sharp knife to slice up the kimbap roll. keep a paper towel soaked with some sesame oil nearby to wipe your knife ever so often to keep it from getting too sticky
- slice them about 1/2 inch pieces. serve with the gochujang dipping sauce to mimic the flavors of bibimbap but this is optional. it is still delicious without the sauce

note | the pictures for kimbap assembly does not match description since i have since learned the correct way to roll the kimbap at the demonstration in seoul so it will not fall apart :)
disclaimer this is written based on my personal experience and opinion. experiences and taste buds may vary for others.

0 comments:
Post a Comment